Have you ever had to install a driver for a printer, and for some magical, superficial reason it refused to install? Maybe giving you the reason that it couldn’t find it or because it was an unsupported OS? Well, there is a pretty good chance we can overcome this. I’ll show you how in this post.
In my scenario, I had to deal with a lot of customers remote logging in via RDP to a server, sometimes located across the country to run specialized software. Windows Server 2008-2016 handles a lot of those printer redirections with what’s known as “Remote Desktop Easy Print”, but not all of the printers play nice with that or print correctly/without issues. HP is notorious for superficially restricting its printers from installation on server OSes. Here is how we overcome this.
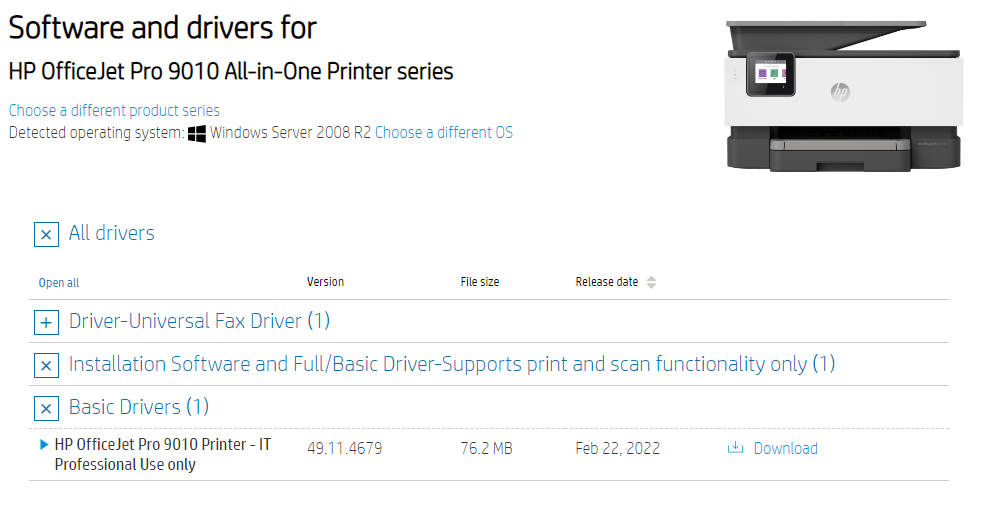
- Download a driver for your printer in question from the manufacturer’s website. If the driver doesn’t exist for the Windows Version you are interested in, look for older Windows Versions. For example, with HP OfficeJet 9010, there were no direct drivers available from their website at the moment of writing this article for Windows 10/11 devices without having to download their EasyPrint utility that installs the drivers for you. The solution to that is to go as far back in the OS version as their selection allows in order to find the actual driver executable. Download that version. In our case, it was drivers for Server 2008 R2.
- Copy the installation file to the server in question.
- Unpack or simply run the installation file to the first prompt to proceed with the installation (in some cases, like with HP, you might immediately get a warning, that installation is not possible, with only one cancel/exit button. Leave that message on the screen.
- Go to Control Panel – View Devices and Printers. At the top of the screen, select Add a Printer.
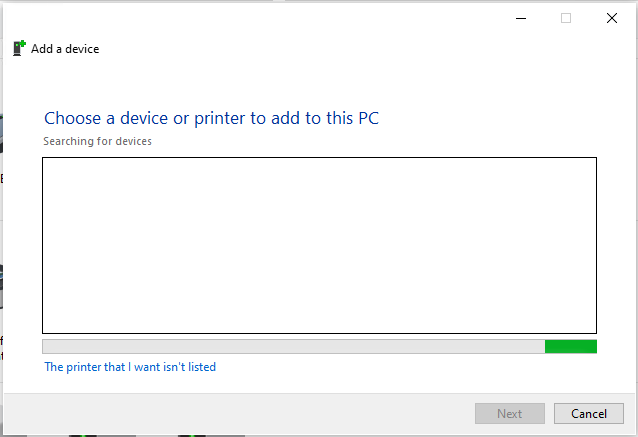
- Select The Printer that I want is not listed
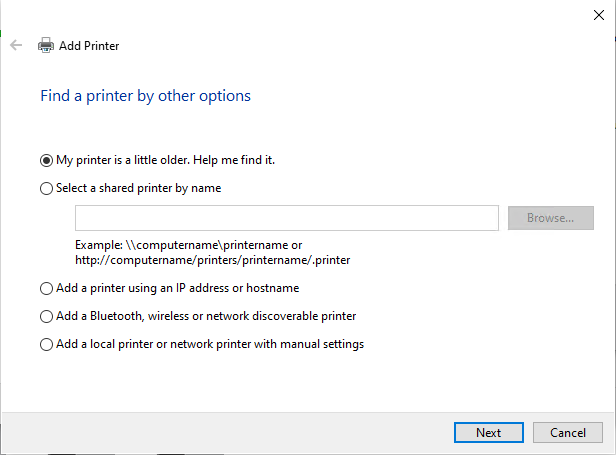
- On the next screen, choose to Add a local printer or network printer with manual settings
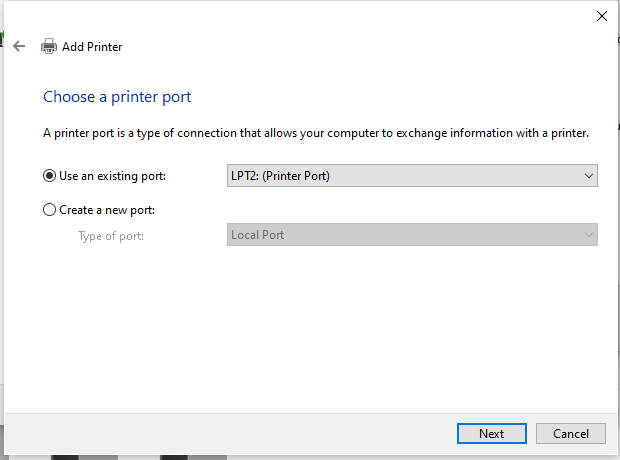
- Then select the correct port. (If you are installing the driver to the server purely for the driver’s sake, since the printer will only be redirected to it at all times, then you can just leave the default port (in this case it’s LPT2). Hit Next.
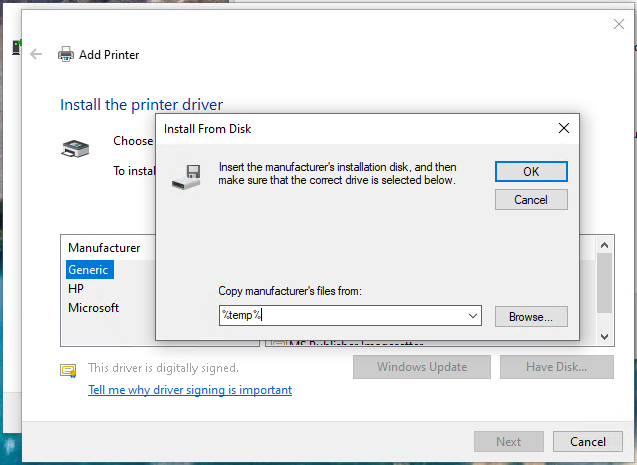
- This is where the fun begins. On the next screen, you will be presented with a list of drivers preloaded into your Windows OS. With our previously opened window of installation of the driver that tells us it’s incompatible, still running in the background, we click on Have Disk… and in the new window that appeared, we type in %temp% and press Browse…
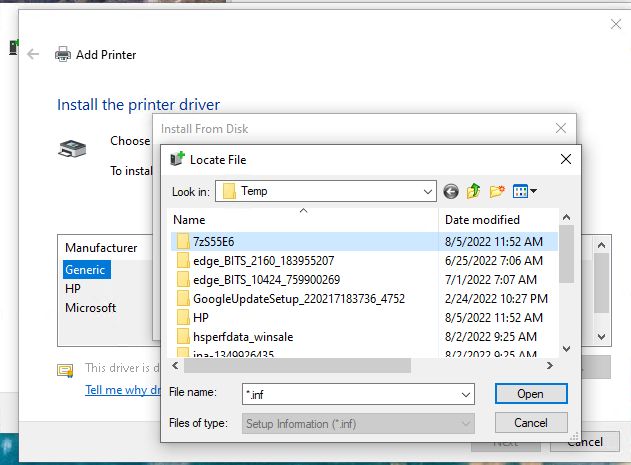
- You will be dropped into the Windows Temp folder. If you look at the Date Modified table, you should see today’s date and time closer to when we started the process. Open that folder. In our case, it’s 7zS55E6
- When the folder is open, you will be presented with multiple folders and sometimes driver files right there. Those will be automatically recognized by the OS, as they will have .inf file extension.
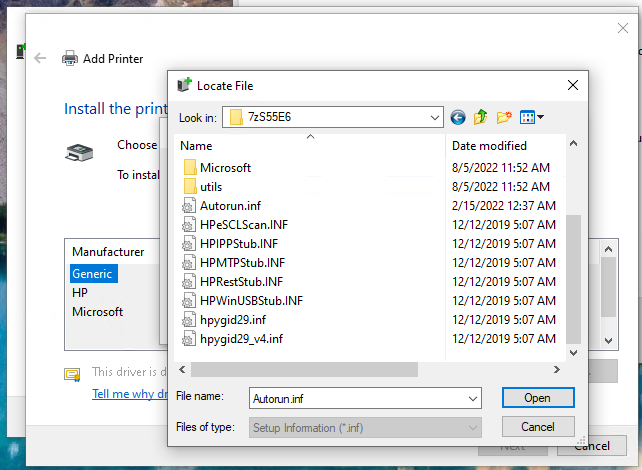
- Select one of the files. In our case it’s Autorun.inf and hit Open. This will bring you to a previous screen, where you just have to hit OK.
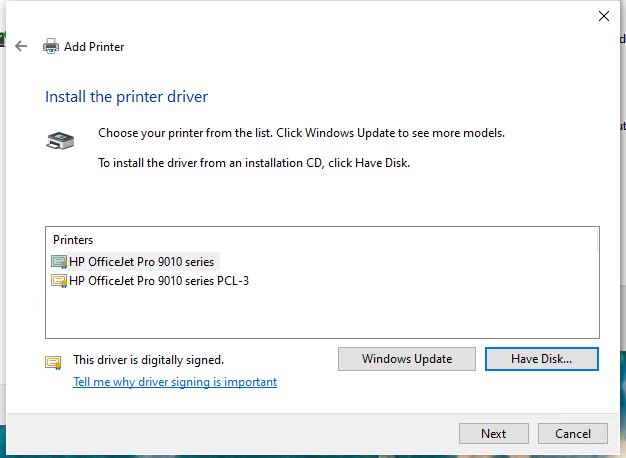
- You are almost there! The next screen will show you the driver that is available to install. Pick one and hit Next a few more times and the driver installation is complete! Congrats! At this point, we are able to overcome artificial barriers put on by the manufacturer and properly use the printers, even in a Remote Desktop environment.
Please note, that in some cases, you might have to also install the same driver to your workstation that is physically/wirelessly connecting to that printer by modifying the installed printer with the same drivers you used for server installation.